‏إظهار الرسائل ذات التسميات crochet. إظهار كافة الرسائل

الاثنين، 8 يوليو 2013

The Modest Violet and The Little Crochet Tutorials By Karen Bailey of Todolwen Blog

Do you love to crochet or tat?  Do you love lace and doilies?  I, for one, do but I have never been able to master the art of crocheting.  It's on my list of skills I would like to master and if I do I'm going to try the two crocheted flowers Karen Bailey has on her Todolwen blog.   I hope you enjoy making Karen's crocheted flowers.

The Modest Violet Tutorial

Copyright © 2012 - All Rights Reserved - Written by Karen Bailey of Todolwen Blog

Here's what Alisa had to say about her tutorial:  Hello my dear friends, today I would like to share a new little tutorial with you. I made a creation a while ago with a baby dress called 'The Modest Violet'. I made a small crochet voilet which I tea stained with a raspberry tea to give it just the right color. Lately a few of you lovely bloggers have asked me for the pattern, but until today I had never made a pattern for it ~ I just made them from memory.

Little Crochet Flowers 

Copyright © 2012 - All Rights Reserved - Written by Karen Bailey of Todolwen Blog

Here's what Karen had to say about her tutorial:  I Am Hooked!   Hello my dear friends, seriously ~ I am hooked! Hooked on crocheting mini flowers from a pattern I made up this morning and now I just can't seem to want to stop making these tiny blooms. It takes not even 5 minutes to have one done. Right now I have no idea what I am going to use them for but I am sure something will pop into my mind.

Please respect Karen's TERMS OF USE:  Please do not copy my tutorials in full and/or claim them to be your own and/or post them on your blog without my permission. Furthermore the sale of my tutorials is prohibited. All my designs are protected under copyright.

Karen's Bio: My name is Karen Bailey, and I am the wife for over 20 years to a now retired british serviceman and a Mum to two beautiful daughters. For many years we traveled and lived all over the world whilst serving in the army. After leaving the army we now live in Ontario, Canada. My passion is antiques, especially victorian unrestored furniture and household items and creating/crafting. For me there is nothing better when I have a moment to sit down and make something beautiful. My blog is 'Todolwen' which is an anogram made up from 'old to new' which is what I love to do ~ take something old and give it a new life. I hope you enjoy my makings as much as I enjoy creating them.

Copyright © 2010 - All Rights Reserved - Karen Bailey of  Todolwen Blog.

Please visit her Todolwen blog at http://todolwen.blogspot.com/.


الثلاثاء، 19 فبراير 2013

How To Make Bead Crochet Beads Tutorial By Alma Stoller

Who doesn't love making bead pendants. I know I do. If you do too then you'll be happy to know that Alma Stoller has a wonderful tutorial on her Alma Stoller blog showing you how to make a bead crochet bead.  Enjoy.


Copyright © 2007- All Rights Reserved - Written By Alma Stoller of Alma Stoller blog.

Here's what Alma had to say about her tutorial:  Here is a quick and easy tutorial on how to crochet a beaded bead.

Please respect Alma's TERMS OF USE:  I encourage you to link back to my post. Please give credit where credit is due. Unless otherwise noted, all photos, text, ideas, tutorials and artwork on this blog are the property of Alma Stoller. I'm happy to share with you, but please do not copy, reproduce or use without permission. Thank you.

Copyright © 2003-2012 - All Rights Reserved - Alma Stoller of Alma Stoller blog. Alma is an artist, designer, and blogger.

Please visit her Alma Stoller blog at http://www.almastoller.blogspot.com/, her Alma Stoller Facebook Page at  https://www.facebook.com/pages/Alma-Stoller/179752818769188 , and her Alma Stoller Tutorials ETSY Shop at http://www.etsy.com/shop/AlmaStollerTutorials.

الاثنين، 26 نوفمبر 2012

Crochety Old Bag - A Tutorial For A Ruffly Crochet Handbag By Ros Coffey of RosMadeMe Blog

I know that I've mentioned that I can't crochet to save my soul. I wish I could because I'd love to try making the Crochety Old Bag that Ros Coffey has on her RosMadeMe Blog blog showing.  How adorable is that? If you can crochet - have a delightful time making your crochet handbag.

Crochety Old Bag - A tutorial For A Ruffly Crochet Handbag

Copyright © 2011 - All Rights Reserved - Written by Ros Coffey of RosMadeMe Blog.

Here's what Ros had to say about her tutorial:  Did you notice how many people have taken up crochet recently, even my guest, Susie blogged about it? So before the bandwagon drives off, here is a little something that I have created for you to make. And if you don't believe me take a look at Handmade Monday on Wendy's wonderful site and see who else has been bitten by the bug.

Ros's Bio:I live by the sea, in Essex, in Leigh-on-sea. I have been making things since I was a child, earliest memories were embroidering squares of binca matting, making felt egg cups and ripping back my knitting when my sister had picked up a dropped stitch... yep, it really did have to be all my own work! I am a dreadful hoarder, with stashes of wool and fabric hidden around my house, together with the projects that I have not yet finished. I am currently making cushions, quilted, appliqued, stencilled... actually just anything that I will enjoy crafting.

Copyright © 2010 - 2012 - All Rights Reserved - Ros Coffey of RosMadeMe Blog .

Please visit her RosMadeMe blog at http://rosmademe.blogspot.com .


الجمعة، 23 نوفمبر 2012

The Snuggly Reversible Cable Scarf - Christmas Tutorial No. 4 By Ros Coffey of RosMadeMe Blog

How would you like to make a gift that you could give to either a male or a female? Impossible you say. Not so. Just check out the reverse cable scarf tutorial that Ros Coffey has on her RosMadeMe Blog blog. Perfect gift for a guy or a gal!

The Snuggly Reversible Cable Scarf - Christmas Tutorial No. 4

Copyright © 2011 - All Rights Reserved - Written by Ros Coffey of RosMadeMe Blog.

Here's what Ros had to say about her tutorial:  Right, who is already running screaming for the door at the thought that not only are you going to cable but your knitting is going to be the same on each side? I promise you it will be really easy, think about it there are three stitches that look the same on both sides: garter, rib and moss or seed stitch and we will be using rib and moss stitch, and to help you further there is a YouTube demo of cabling pasted at the end of the pattern.

The scarf is made with Sirdar Big Softie and measures 6' 6" and the great thing is it will knit up really quickly... I made mine in two days on the train (45 min train journeys) and the great thing is with size 10 needles few are brave enough to sit next to you! The good news is this scarf is butch enough for chaps and, soft and snuggly enough for girls.


Ros's Bio:I live by the sea, in Essex, in Leigh-on-sea. I have been making things since I was a child, earliest memories were embroidering squares of binca matting, making felt egg cups and ripping back my knitting when my sister had picked up a dropped stitch... yep, it really did have to be all my own work! I am a dreadful hoarder, with stashes of wool and fabric hidden around my house, together with the projects that I have not yet finished. I am currently making cushions, quilted, appliqued, stencilled... actually just anything that I will enjoy crafting.

Copyright © 2010 - 2012 - All Rights Reserved - Ros Coffey of RosMadeMe Blog .

Please visit her RosMadeMe blog at http://rosmademe.blogspot.com .

Rufty Tufty Boys Beanie Hat Tutorial By Ros Coffey of RosMadeMe Blog

If you love to knit and are looking for a beanie to make for a little boy then you'll be pleased to know that Ros Coffey has a tutorial on her RosMadeMe Blog blog showing you how to make a "Rufty Tufty Boys Beanie Hat." Have fun knitting.

Rufty Tufty Boys Beanie Hat

Copyright © 2011 - All Rights Reserved - Written by Ros Coffey of RosMadeMe Blog.

Here's what Ros had to say about her tutorial:  I have found lots of hats for little girls but hats for little boys are few and far between, so using the classic beanie design which uses multiples of eight stitches and knits in the round, I came up with a little number in cotton, which is both soft, structured and textured. They are such a quick knit I have made four for my first Spring Craft Show on Saturday, fingers crossed that they sell well!

Ros's Bio:I live by the sea, in Essex, in Leigh-on-sea. I have been making things since I was a child, earliest memories were embroidering squares of binca matting, making felt egg cups and ripping back my knitting when my sister had picked up a dropped stitch... yep, it really did have to be all my own work! I am a dreadful hoarder, with stashes of wool and fabric hidden around my house, together with the projects that I have not yet finished. I am currently making cushions, quilted, appliqued, stencilled... actually just anything that I will enjoy crafting.

Copyright © 2010 - 2012 - All Rights Reserved - Ros Coffey of RosMadeMe Blog .

Please visit her RosMadeMe blog at http://rosmademe.blogspot.com .

الأحد، 11 نوفمبر 2012

Weston Woollies - A Cabled Hat and Scarf Pattern Tutorial By Ros Coffey of RosMadeMe Blog

Do you like to knit? Are you looking for a great gift? If you do and you are then you'll be pleased to know that Ros Coffey has a tutorial on her RosMadeMe Blog blog showing you how to knit a cable hat and scarf.

Weston Woollies - A cabled hat and scarf pattern

Copyright © 2012 - All Rights Reserved - Written by Ros Coffey of RosMadeMe Blog.

Here's what Ros had to say about her tutorial:  This is a hat and scarf created as a Christmas gift for my friend Miss Weston, hence the name, Weston Woollies, she is very much a hat, scarf and mittens girl in the Winter.

Ros's Bio:I live by the sea, in Essex, in Leigh-on-sea. I have been making things since I was a child, earliest memories were embroidering squares of binca matting, making felt egg cups and ripping back my knitting when my sister had picked up a dropped stitch... yep, it really did have to be all my own work! I am a dreadful hoarder, with stashes of wool and fabric hidden around my house, together with the projects that I have not yet finished. I am currently making cushions, quilted, appliqued, stencilled... actually just anything that I will enjoy crafting.

Copyright © 2010 - 2012 - All Rights Reserved - Ros Coffey of RosMadeMe Blog .

Please visit her RosMadeMe blog at http://rosmademe.blogspot.com .

Ribbon and Lace Tassel Tutorial By Karen Bailey of Todolwen Blog

Do you like making ribbon and lace tassels?  If you do then you'll be happy to know that Karen Bailey has a wonderful tutorial on her Todolwen blog showing you how to make ribbon and lace tassels.  Have fun making yours!

Ribbon and Lace Tassel Tutorial

Copyright © 2011 - All Rights Reserved - Written by Karen Bailey of Todolwen Blog

Here's what Karen had to say about her tutorial:  Hello my dear friends, this is what I made with some of the lace I showed you yesterday. It is a decorative tassel which you could use to hang on your door, wall or anywhere you would like. I didn't buy anything for this creation - I found everything in my craft room and it is very easy to make.

Please respect Karen's TERMS OF USE:  Please do not copy my tutorials in full and/or claim them to be your own and/or post them on your blog without my permission. Furthermore the sale of my tutorials is prohibited. All my designs are protected under copyright.

Karen's Bio: My name is Karen Bailey, and I am the wife for over 20 years to a now retired british serviceman and a Mum to two beautiful daughters. For many years we traveled and lived all over the world whilst serving in the army. After leaving the army we now live in Ontario, Canada. My passion is antiques, especially victorian unrestored furniture and household items and creating/crafting. For me there is nothing better when I have a moment to sit down and make something beautiful. My blog is 'Todolwen' which is an anogram made up from 'old to new' which is what I love to do ~ take something old and give it a new life. I hope you enjoy my makings as much as I enjoy creating them.

Copyright © 2011 - All Rights Reserved - Karen Bailey of  Todolwen Blog.

Please visit her Todolwen blog at http://todolwen.blogspot.com/.

الاثنين، 29 أكتوبر 2012

Pierina's Snuggly Hot Water Bottle Cover - Christmas Tutorial No. 12 By Ros Coffey of RosMadeMe Blog

If you love to knit and are looking for a great gift for someone who is always cold then you'll be pleased to know that Ros Coffey has another wonderful  tutorial on her RosMadeMe Blog blog showing you how to make a knitted hot water bottle cover.  What a great gift.

Pierina's Snuggly Hot Water Bottle Cover - Christmas Tutorial no. 12

Copyright © 2011 - All Rights Reserved - Written by Ros Coffey of RosMadeMe Blog.

Here's what Ros had to say about her tutorial:  My best friend is Pierina, I met her on my first day at secondary school, over 40 years ago and she has the misfortune to live in a household of hot blooded men! So hot blooded are they that they constantly turn down/off the radiators, which means that layers and a hot water bottle are the only way for a girl to go!

Now this is a really easy and quick gift to make for your friends, it took me just over three hours to knit and another hour to Swiss darn and sew up. To add a little more interest we will also be using a twisted rib, which sounds so much more complicated than it really is and a moss/seed stitch frame to emphasise your Swiss darning. You can vary the darning to create a snowflake, initials or any other pattern that takes your fancy... I have used a heart cos I love my hot water bottle in the Winter!


Ros's Bio:I live by the sea, in Essex, in Leigh-on-sea. I have been making things since I was a child, earliest memories were embroidering squares of binca matting, making felt egg cups and ripping back my knitting when my sister had picked up a dropped stitch... yep, it really did have to be all my own work! I am a dreadful hoarder, with stashes of wool and fabric hidden around my house, together with the projects that I have not yet finished. I am currently making cushions, quilted, appliqued, stencilled... actually just anything that I will enjoy crafting.

Copyright © 2010 - 2012 - All Rights Reserved - Ros Coffey of RosMadeMe Blog .

Please visit her RosMadeMe blog at http://rosmademe.blogspot.com .

الأربعاء، 24 أكتوبر 2012

New Birds Nest From Old Doilies Tutorial By Karen Bailey of Todolwen Blog

I love doilies and love decorating my home with them.  So, I was pleased to see that Karen Bailey had a wonderful tutorial on her Todolwen blog showing you how to make a birds nest from old doilies.  What an adorable decoration.

New Birds Nest From Old Doilies Tutorial

Copyright © 2011 - All Rights Reserved - Written by Karen Bailey of Todolwen Blog

Here's what Karen had to say about her tutorial:  Bring Out Your Doilies - A New Birds Nest Tutorial - Hello my dear friends, whilst working with my little coconut fibre pot on Tuesday and waiting for the tea stained eggs to dry I thought it would be nice to come up with a new little tutorial for you! After my Easter basket which was made from a stiffened doily my thoughts went with a nest made the same way.

Please respect Karen's TERMS OF USE:  Please do not copy my tutorials in full and/or claim them to be your own and/or post them on your blog without my permission. Furthermore the sale of my tutorials is prohibited. All my designs are protected under copyright.

Karen's Bio: My name is Karen Bailey, and I am the wife for over 20 years to a now retired british serviceman and a Mum to two beautiful daughters. For many years we traveled and lived all over the world whilst serving in the army. After leaving the army we now live in Ontario, Canada. My passion is antiques, especially victorian unrestored furniture and household items and creating/crafting. For me there is nothing better when I have a moment to sit down and make something beautiful. My blog is 'Todolwen' which is an anogram made up from 'old to new' which is what I love to do ~ take something old and give it a new life. I hope you enjoy my makings as much as I enjoy creating them.

Copyright © 2011 - All Rights Reserved - Karen Bailey of  Todolwen Blog.

Please visit her Todolwen blog at http://todolwen.blogspot.com/.

How To Block A Crocheted Doily Tutorial By Pamela Kellogg of Kitty and Me Designs

Have you ever wondered how to block a doily or cross-stitch design.  If you have and want to learn how to do this you'll be pleased to know that Pamela Kellogg has a tutorial on her Kitty & Me Designs blog showing you how.

How To Block A Crocheted Doily Tutorial

Copyright © 2010 - All Rights Reserved - Written by Pamela Kellogg of Kitty & Me Designs.

Here's what Pamela had to say about her tutorial:  Happy Sunday everyone! I've been busy, busy, busy! Yes, too busy and I'm winding down now but I am the way I am! My ADD motor is always going!

I made a big pot of soup, 2 batches of cookies and a loaf of wheat bread. I have all the laundry caught up and added 2 more of my mom's Victorian Tussy Mussy's for Mother's Day to our Etsy shop:

Aren't they pretty? Mom really has a knack for these!

Another thing I did today was to block a couple of crocheted doilies and I thought I would write a tutorial for anyone who doesn't know how to do this. Many crocheted pieces can be ironed into shape but there are some that just won't cooperate unless they are blocked.


Please respect Pamela's TERMS OF USE:  I like to share Craft and Embroidery Tutorials on how I do a variety of projects and techniques and helpful hints. I add to this list regularly. Please feel free to download the directions and if you try them, please let me know if you enjoyed the project!

Pamela's Bio:Designer, Textile Artist and Instructor. Although I love all forms of needlework and embroidery, my true passion is Crazy Quilting. I enjoy a quiet life in our little cottage by a lake in Northern Illinois. I frequent flea markets and antique shops looking for do-dads that I can sew on to my stitching projects. I offer some of my handmade items, along with my mom's and my sister's, in my Etsy shop. I enjoy baking and share many of my recipes here. And did I mention glitter?

Copyright © 2005 - 2012 - All Rights Reserved - Pamela Kellogg of Kitty & Me Designs .

Please visit her Kitty & Me Designs blog at http://kittyandmedesigns.blogspot.com/ and her Kitty & Me Designs Etsy shop at http://www.etsy.com/shop/kittyandme.

الثلاثاء، 18 سبتمبر 2012

A Little Bit Of Luxury - Alpaca Wrist Warmers Tutorial By Ros Coffey of RosMadeMe Blog

My sister is going to love the next tutorial.  You see, she raises alpacas and is always looking for ideas of what to make from the yarn.  If you like to knit and love the soft feel of alpaca yarn then you'll be pleased to know that Ros Coffey has a tutorial on her RosMadeMe Blog blog showing you how to make alpaca wrist warmers.   My sister's going to love it.

A Little Bit Of Luxury - Alpaca Wrist Warmers

Copyright © 2011 - All Rights Reserved - Written by Ros Coffey of RosMadeMe Blog.

Here's what Ros had to say about her tutorial:  I have finally had the chance to write up the pattern for the wrist warmers... as you may remember they came about because a sample ball was sent to the LYS and I got to play with it.

Ros's Bio:I live by the sea, in Essex, in Leigh-on-sea. I have been making things since I was a child, earliest memories were embroidering squares of binca matting, making felt egg cups and ripping back my knitting when my sister had picked up a dropped stitch... yep, it really did have to be all my own work! I am a dreadful hoarder, with stashes of wool and fabric hidden around my house, together with the projects that I have not yet finished. I am currently making cushions, quilted, appliqued, stencilled... actually just anything that I will enjoy crafting.

Copyright © 2010 - 2012 - All Rights Reserved - Ros Coffey of RosMadeMe Blog .

Please visit her RosMadeMe blog at http://rosmademe.blogspot.com .

الخميس، 13 سبتمبر 2012

Vintage Jelly Form Pincushion Free Tutorial By Karen Bailey of Todolwen Blog

I have a passion for pincushions and love seeing the millions of different pincushion creations there are on the web for them.  I thought I had seen just about every kind there was, but Karen Bailey surpised me with a wonderful tutorial on her Todolwen blog showing you how to make a vintage jelly form pincushion.  That's definitely one I haven't seen before.

Vintage Jelly Form Pincushion Tutorial

Copyright © 2012 - All Rights Reserved - Written by Karen Bailey of Todolwen Blog

Here's what Karen had to say about her tutorial:  At First Disapointed But Not Anymore ~ A New Tutorial - Hello my dear friends, I woke up at 6 am yesterday morning and since it was a grey and rainy morning and I had no intention to venture out of the house or wanted to spend my day tidying my craft room (I know I really should have), I decided I wanted to create a new tutorial for you in which I was going to recycle small tins. I sat down in my dining room at the big window for about 2 hours, wrote the instructions as a post, saved it and then worked on the actual creating part but unfortunately things just didn't want to look the way I had imagined them, so I gave up on the idea for the moment. Eventually I will return to it and work on it more another time. You never know, it might work out fine the next time round.

I must admit I was quite disappointed with myself that my idea didn't work, so I just had to try something different, hoping it would work out this time. The basic idea stayed the same but I decided to use different materials then I had chosen the first time and I think it worked out fine. So here is a new tutorial for you ...

... a vintage jelly form pincushion tutorial.

Please respect Karen's TERMS OF USE:  Please do not copy my tutorials in full and/or claim them to be your own and/or post them on your blog without my permission. Furthermore the sale of my tutorials is prohibited. All my designs are protected under copyright.

Karen's Bio: My name is Karen Bailey, and I am the wife for over 20 years to a now retired british serviceman and a Mum to two beautiful daughters. For many years we traveled and lived all over the world whilst serving in the army. After leaving the army we now live in Ontario, Canada. My passion is antiques, especially victorian unrestored furniture and household items and creating/crafting. For me there is nothing better when I have a moment to sit down and make something beautiful. My blog is 'Todolwen' which is an anogram made up from 'old to new' which is what I love to do ~ take something old and give it a new life. I hope you enjoy my makings as much as I enjoy creating them.

Copyright © 2012 - All Rights Reserved - Karen Bailey of  Todolwen Blog.

Please visit her Todolwen blog at http://todolwen.blogspot.com/.

Needle Holder Free Tutorial By Ros Coffey of RosMadeMe Blog

I just LOVE things to help me organize my crafting supplies.  Don't you?    If you do then you'll be pleased to know that Ros Coffey has a tutorial on her RosMadeMe Blog blog showing you how to make a knitting needle storage roll.

Roll on 2012 - The first tutorial of 2012

Copyright © 2012 - All Rights Reserved - Written by Ros Coffey of RosMadeMe Blog.

Here's what Ros had to say about her tutorial:  Well, Happy New Year everyone! Just wanted to welcome all the new readers and to thank my old readers for coming back, what kept you all... we have loads to make this year, so let's get started.

Right, ladies and gentlemen, here is the first tutorial of 2012 and this is a purely selfish one with a practical purpose. You may have noticed that last year I discovered that I had been lied to, sock knitting is not difficult, you do not need lots of little markers and actually although I say so myself, I make a jolly good fist of it but it has created a problem, where do I store all the DPNs (double pointed needles... the ones I like to use on the train to get a double seat as they look quite scary) and my circular needles? Now if the thought of making a needle storage roll is making you yawn, then remember that it can also be used to store make up/paint brushes, crochet hooks and coloured pencils for children and yes, Marion - we are starting on the contents of your Summer fete stall right here.


Ros's Bio:I live by the sea, in Essex, in Leigh-on-sea. I have been making things since I was a child, earliest memories were embroidering squares of binca matting, making felt egg cups and ripping back my knitting when my sister had picked up a dropped stitch... yep, it really did have to be all my own work! I am a dreadful hoarder, with stashes of wool and fabric hidden around my house, together with the projects that I have not yet finished. I am currently making cushions, quilted, appliqued, stencilled... actually just anything that I will enjoy crafting.

Copyright © 2010 - 2012 - All Rights Reserved - Ros Coffey of RosMadeMe Blog .

Please visit her RosMadeMe blog at http://rosmademe.blogspot.com .

الخميس، 30 أغسطس 2012

Little Flowers In Salt Shaker Vase Free Tutorial By Karen Bailey of Todolwen Blog

I just love paper creations - especially when they are combined with another one of my loves which is floral crafts.  So, I was pleased to see that Karen Bailey had a wonderful tutorial on her Todolwen blog showing you how to make little paper flowers in a saltshaker vase. They are just too adorable to resist.

LITTLE FLOWERS IN SALT SHAKER VASE

Copyright © 2011 - All Rights Reserved - Written by Karen Bailey of Todolwen Blog

Here's what Karen had to say about her tutorial: My First Tutorial. Hello my dear Friends. As I mentioned yesterday, I was working on a tutorial for the little flowers in the salt-shaker vase. Well, it is ready. So, here we go!

Please respect Karen's TERMS OF USE:  Please do not copy my tutorials in full and/or claim them to be your own and/or post them on your blog without my permission. Furthermore the sale of my tutorials is prohibited. All my designs are protected under copyright.

Karen's Bio: My name is Karen Bailey, and I am the wife for over 20 years to a now retired british serviceman and a Mum to two beautiful daughters. For many years we traveled and lived all over the world whilst serving in the army. After leaving the army we now live in Ontario, Canada. My passion is antiques, especially victorian unrestored furniture and household items and creating/crafting. For me there is nothing better when I have a moment to sit down and make something beautiful. My blog is 'Todolwen' which is an anogram made up from 'old to new' which is what I love to do ~ take something old and give it a new life. I hope you enjoy my makings as much as I enjoy creating them.

Copyright © 2011 - All Rights Reserved - Karen Bailey of  Todolwen Blog.

Please visit her Todolwen blog at http://todolwen.blogspot.com/.

الثلاثاء، 29 مايو 2012

Jam Jar Cozy Free Crochet Tutorial by Carina Envoldsen-Harris of Carina's Craftblog

One of these days I am going to learn how to crochet.  When I do I think I'll make Carina's Jam Jar Cozy in blue.  What an adorable way to decorate a jam jar cozy.  Enjoy.


Copyright © 2010 - All Rights Reserved - Written by Carina Envoldsen-Harris of Carina's Craftblog blog.

Here's what Carina had to say about her tutorial: As promised, the crochet jar cosy tutorial. You can use one or more colours to suit your taste. I think it is nice with atleast a couple of colours just because I like colour. ;-)

Please respect Carina's TERMS OF USE:BE NICE: DON'T STEAL - I spend hours thinking up projects, taking pictures, processing the pictures and writing tutorials and posts. So please respect the work that goes into this and don't steal my content. You are welcome to use the tutorials and patterns for your own personal crafting pleasure. And if you like them, feel free to share links to them. You can even borrow an image or two if you link back here. Sharing is nice, it's what makes the crafty blogosphere so great! But stealing other people's content and passing it off as your own is not nice at all. So don't be that guy. Or gal. Translating my tutorials or removing my copyright notice from images and posting the content as your own is not allowed. Thank you. Got a question about something? Want to know a bit about me? Need help with something? Check out the fancy pants FAQ page!

Carina's Bio: Carina is a Danish girl living in Essex, England with her husband. She's an artist and crafter who loves to crochet, draw, sew, paint, and embroider.

Copyright © 2010 - All Rights Reserved - Written by Carina Envoldsen-Harris of Carina's Craftblog  blog. Please visit Carina's new Carina's Craftblog blog at http://carinascraftblog.wardi.dk ,  her Wardi.dk website, her Carina Wardi Etsy shop, and her Polka & Bloom Etsy shop .


السبت، 19 مايو 2012

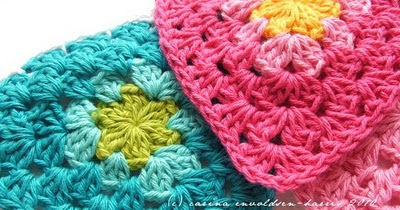
Crochet Granny Triangle Free Tutorial by Carina Envoldsen-Harris of Carina's Craftblog

I can remember my mother making granny squares for a colorful afghan she was making and wishing I could crochet. If you love granny squares and want to learn how to crochet a granny square you'll be happy to know that Carina Envoldsen-Harris has another wonderful tutorial showing you how. Have fun making your granny squares.

Copyright © 2010 - All Rights Reserved - Written by Carina Envoldsen-Harris of Carina's Craftblog 

Here's what Carina had to say about her tutorial:  So! Here we go with the granny triangle tutorial. Did you master the magic circle yet? Ready to go? By the way, this is the yarn I use. If you don't fancy using the magic circle, you can make a ring by making 4 chain stitches and joining them into a ring. Please note, I am using the American crochet terms in this tutorial. :-)

Please respect Carina's TERMS OF USE:BE NICE: DON'T STEAL - I spend hours thinking up projects, taking pictures, processing the pictures and writing tutorials and posts. So please respect the work that goes into this and don't steal my content. You are welcome to use the tutorials and patterns for your own personal crafting pleasure. And if you like them, feel free to share links to them. You can even borrow an image or two if you link back here. Sharing is nice, it's what makes the crafty blogosphere so great! But stealing other people's content and passing it off as your own is not nice at all. So don't be that guy. Or gal. Translating my tutorials or removing my copyright notice from images and posting the content as your own is not allowed. Thank you. Got a question about something? Want to know a bit about me? Need help with something? Check out the fancy pants FAQ page!

Carina's Bio: Carina is a Danish girl living in Essex, England with her husband. She's an artist and crafter who loves to crochet, draw, sew, paint, and embroider.

Copyright © 2010 - All Rights Reserved - Written by Carina Envoldsen-Harris of Carina's Craftblog  blog. Please visit Carina's new Carina's Craftblog blog at http://carinascraftblog.wardi.dk ,  her Wardi.dk website, her Carina Wardi Etsy shop, and her Polka & Bloom Etsy shop .


الثلاثاء، 15 مايو 2012

Crochet Magic Ring Free Tutorial by Carina Envoldsen-Harris of Carina's Craftblog

I've probably told you before that I have never been able to master the art of crocheting.  I tried it as a teenager and just could never get it.   Perhaps I should try again.  If I decide to perhaps I'll start with Carina Envoldsen-Harris's Crochet Magic Ring Tutorial.  Enjoy!

Copyright © 2010 - All Rights Reserved - Written by Carina Envoldsen-Harris of Carina's Craftblog blog.

Here's what Carina had to say about her tutorial: Mmm... happy colours! Ok, so there's a granny triangle tutorial in the works, but first I'm going to show you how to make a magic ring. This is a very handy thing to know how to make. Not just for granny triangles! Why is it handy? Because it can make centres of your work look a lot better. You're basically crocheting over an adjustable ring which you can pull tight. By the way, this is the yarn I use.

And despite its name, there is actually no magic involved whatsoever. I am sorry to disappoint you!


Please respect Carina's TERMS OF USE: BE NICE: DON'T STEAL - I spend hours thinking up projects, taking pictures, processing the pictures and writing tutorials and posts. So please respect the work that goes into this and don't steal my content. You are welcome to use the tutorials and patterns for your own personal crafting pleasure. And if you like them, feel free to share links to them. You can even borrow an image or two if you link back here. Sharing is nice, it's what makes the crafty blogosphere so great! But stealing other people's content and passing it off as your own is not nice at all. So don't be that guy. Or gal. Translating my tutorials or removing my copyright notice from images and posting the content as your own is not allowed. Thank you. Got a question about something? Want to know a bit about me? Need help with something? Check out the fancy pants FAQ page!

Carina's Bio: Carina is a Danish girl living in Essex, England with her husband. She's an artist and crafter who loves to crochet, draw, sew, paint, and embroider.

Copyright © 2010 - All Rights Reserved - Written by Carina Envoldsen-Harris of Carina's Craftblog blog. Please visit Carina's new Carina's Craftblog blog at http://carinascraftblog.wardi.dk ,  her Wardi.dk website, her Carina Wardi Etsy shop, and her Polka & Bloom Etsy shop .

الخميس، 3 مايو 2012

Crochet Bunting Free Tutorial by Carina Envoldsen-Harris of Carina's Craftblog

How I wish I could crochet.  If I could I'd LOVE to make this bright and cheery crochet bunting.  I can just picture it hanging in a baby or little girl's room.  I hope you enjoy Carina's crochet bunting tutorial.


Copyright © 2010 - All Rights Reserved - Written by Carina Envoldsen-Harris of Carina's Craftblog  blog.

Here's what Carina had to say about her tutorial: Let's put some triangles together! It's easy! Grab your triangles and sort them so they look all pretty like. By the way, this is the yarn I use.

Please respect Carina's TERMS OF USE: BE NICE: DON'T STEAL - I spend hours thinking up projects, taking pictures, processing the pictures and writing tutorials and posts. So please respect the work that goes into this and don't steal my content. You are welcome to use the tutorials and patterns for your own personal crafting pleasure. And if you like them, feel free to share links to them. You can even borrow an image or two if you link back here. Sharing is nice, it's what makes the crafty blogosphere so great! But stealing other people's content and passing it off as your own is not nice at all. So don't be that guy. Or gal. Translating my tutorials or removing my copyright notice from images and posting the content as your own is not allowed. Thank you. Got a question about something? Want to know a bit about me? Need help with something? Check out the fancy pants FAQ page!

Carina's Bio: Carina is a Danish girl living in Essex, England with her husband. She's an artist and crafter who loves to crochet, draw, sew, paint, and embroider.

Copyright © 2010 - All Rights Reserved - Written by Carina Envoldsen-Harris of Carina's Craftblog blog. Please visit Carina's new Carina's Craftblog blog at http://carinascraftblog.wardi.dk ,  her Wardi.dk website, her Carina Wardi Etsy shop, and her Polka & Bloom Etsy shop .

الأربعاء، 11 أبريل 2012

Four Free Hat Patterns For Blythe From Lisa Bunting Thoms of Q.D. Patooties

I thought you might all like to know that Lisa Bunting Thoms of Q.D. Patooties has four wonderful free patterns to share for making 3 crocheted and 1 sewn hat for BLYTHE. I hope you enjoy making all of Blythe's hats.


Cloche Hat (Crochet)
Copyright © 2008-2009 - All Rights Reserved - Lisa Bunting Thoms of Q.D. Patooties

Here's the instructions and what Lisa had to say about her clothe hat:  This is a very easy beginners FREE crochet pattern that whips up in just over an hour. Since I have been bitten by the "Blythe Bug" as I mentioned yesterday, it was only a matter of time before I started creating things for her and this just happens to be the first of probably many patterns. 

Materials:
Patons "Classic Wool" Merino, 100% Wool, 3 1/2 oz. (100g) in Blue Marl (variegated white/blue)

Size D/3 (3.25mm) Crochet Hook
Directions:

To Begin, Ch10 and join the first and last stitches to form a loop.
Rd. 1: Ch 3 and then 15 DC inside the loop.

Rd. 2: Ch 3 and then 1 DC inside the first DC followed by a SC all the way around. So you should have a stitch followed by a hole.

Rd. 3: Ch 3 and then in the new hole that you’ve made do 2 DC followed by 1 SC then 2 DC in the next followed by 2 SC. It will start to look almost like a lace doily.

Rd. 4: Ch 3 and then in the first that you’ve made do 3 DC followed by 1 SC then 3 DC in the next followed by 2 SC .

Rd. 5 - 6: Ch3 and then in the first stitch that you’ve made do 3 DC followed by 2 SC all the way around. You’re gradually “increasing” the size of your doll’s hat.

Rd. 7 - 10: Rd. 4: Ch 3 and then in the first stitch that you’ve made do 3 DC followed by 1 SC then 3 DC in the next followed by 2 SC.

Rd. 11: For the shell trim, SC in the first stitch, HDC in the second stitch, 1 DC, 1 TDC, 1 DC in the third stitch, HDC in the fourth stitch and a SC in the fifth stitch. Repeat all the way around the rim of the hat.
Since this hat is "lacy" and has some holes, you can weave some coordinating ribbon through the openings and tie it in a bow to add a little decorative touch. Enjoy!

Kisses from Elvish Beret (Crochet)
Copyright © 2008-2009 - All Rights Reserved - Lisa Bunting Thoms of Q.D. Patooties

Here's the instructions and what Lisa had to say about her kisses from elvish beret:   Here's a little beret I just finished for my Blythes. It kind of looks like a little Hershey's Kiss Elf hat so of course the name "Kisses from Elvish" seemed appropriate.

Kisses from Elvish Beret


Materials Needed:
3.75mm (Size F) Crochet Hook
Joann’s Fabrics Sensations Angel Hair Yarn Color 4361 or similar


To start: Ch4. Join first link to last to form a ring.
Round 1: 8 DC in ring. Join first to last and then Ch3.
Round 2: DC in each stitch. Join first to last and then Ch3.
Round 3: DC in first DC then Ch1; repeat until round is complete. Join first to last and then Ch3.
Round 4: Repeat Round 3.
Round 5: DC in each stitch. Join first to last and then Ch3.
Round 6: DC in each stitch. Join first to last and then Ch3.
Round 7: DC in first DC then Ch1; repeat until round is complete. Join first to last and then Ch3.
Round 8: DC in each stitch. Join first to last and then Ch3.
Round 9: DC in first 4 stitches, Skip 1. Repeat until the round is complete. Join first to last and then Ch2.
Round 10: HDC in each stitch, join and tie off when round is complete. 


Your stylish “Kisses from Elvish Beret” is now ready to wear!


Simple Winter Cap (Crochet)
Copyright © 2008-2009 - All Rights Reserved - Lisa Bunting Thoms of Q.D. Patooties

Instructions:
Materials:
Medium Weight Yarn (4)
Size H, 5.00mm Crochet Hook

Ch 4. Join to form a loop.
Row 1. 13 DC inside of loop. Ch 2.
Rows 2 - 4. 1 DC in first stitch, 2 DCs in second stitch. Continue until row is complete. Ch 2.
Rows 5 - 7. 1 DC in each stitch. Continue until row is complete. Ch 2.
Row 8. 1 DC in the "front" of the first three stitches followed by 1 DC in the back of the next three stitches. Repeat pattern until row is complete. Pattern will resemble fake "ribbing." Tie off. Enjoy!


Spidey Hat (Sewing) 
Copyright © 2008-2009 - All Rights Reserved - Lisa Bunting Thoms of Q.D. Patooties


Here's the instructions and what Lisa had to say about her Spidey Hat: For this project, you'll need a pair of one size fits all knit gloves and a single mitten from a one size fits all set of knit mittens. The gloves will serve as the "body" of your spider and then the mitten will be the lining of your hat. I found my gloves and mitten sets at Target. They are $1.49 and you get two pairs so you'll be able to make two complete hats for your Blythe dolls for less than $5.00. Other supplies you'll need include a some sharp scissors, some clear drying tacky or fabric glue, two 1-inch Pom-Poms for eyeballs, two 1/2-inch Pom-Poms for pupils, a small amount of Polyfil stuffing, a needle, some thread, embroidery floss, and a stuffing stick. If you'd like to use your sewing machine, you can use that too. This project is small enough though that it can be completed quickly in under an hour without a sewing machine. So, it's up to you.

1)  Cut the cuffs off of your gloves as well as the thumb (sorry I didn't show that step) and then cut the top off of your mitten (almost down to the thumb joint on the mitten). As I mentioned, the gloves will be the body of your spider and the mitten top will be the liner of your hat.

2)  With right sides together, sew your gloves up the center seam to form your spider body.

3)  Then, turn your spider body inside out and insert your mitten top as shown in the photo above. Sew all the way around leaving about an 1 1/2 opening so you can turn your hat.

4)  When you turn your hat, it should look like the photo above. It almost looks like an octopus instead of a spider! But that might be another tutorial (heh, heh, heh). Using your stuffing stick, go through the small hole you left to turn your spider and fill his "legs" with a small amount of Polyfil. You don't want to stuff them too much or they won't stand up right. Also, the white stuffing will show through your knit fabric. Then, ladder stitch your hole shut.

5)  Using some embroidery floss, make a silly grin on your spider's face. Glue together the eyes and let them dry so you can glue them on top of your hat.

6)  One you glue the eyes on top of your hat and they dry, it will be ready to wear. Enjoy!

Please respect Lisa's TERMS OF USE:  My FREE tutorials, patterns, and how-to's are for personal use only and are not not intended for commercial use. They may not be copied, reprinted, emailed, or reproduced and distributed in any manner without my permission.

Lisa's Bio: Lisa is a professional teddy bear artist selling heirloom quality collectible bears to Adults and has been making bears professionally since November 1997. Her creations have been nominated for several Awards including the TITA, Teddy Bear Scene Reader's Choice Awards and the Ace Awards. They've also been included on a regular basis in many of the major doll and crafts magazines.

Copyright © 2007-2012 - All Rights Reserved - Lisa Bunting Thoms of Q.D. Patooties at http://qdpatooties.blogspot.com.

Please visit Lisa's Q.D. Patooties Spoonflower Fabric Shop and her Q.D. Patooties Etsy Shop.

الاثنين، 9 أبريل 2012

Crocheted Sock Monkey Free Pattern by Lisa Bunting Thoms of Q.D. Patooties

If you like to crocheted animals then you'll be pleased to know that Lisa Bunting Thoms of  Q.D. Patooties has another wonderful crochet pattern to share.  This =one is for an adorable monkey.

Crocheted Sock Monkey Pattern


Here's the instructions and what Lisa had to say about her Crocheted Sock Monkey Pattern:  Well, I've had a couple of people, some of whom mentioned they have smaller computer screens, complain that they cannot read the entire Sock Monkey pattern because the photos overlap the words. So I decided, in my infinite wisdom, to just do a post of the pattern verbage without the pictures for those of you who are picture impaired. Sorry about that guys! I really have my screen resolution adjusted so it's the same as a majority of people who visit my website. If any other patterns or tutorials do not show up as you think they should, please let me know and I'll be happy to try to help.

Crocheted Sock Monkey Pattern by Lisa Thoms
Materials Needed:

Patons "Classic Wool" Merino, 100% Wool, 3 1/2 oz. (100g) in Natural Marl (variegated white/brown), Winter White, and Bright Red
Size F/5 (3.75mm) Crochet Hook
Sewing Needle
Polyfil

Symbols:
sl st = slip stitch; ; st = stitch; ch = chain; hdc = half double crochet; dc = double crochet; tc = treble crochet

Head:
Round 1: Using your Winter White Yarn, Ch 4 connecting the first stitch to the last with a sl st to form a ring. Ch 2 and then 15 hdc in the center of the ring. Join the first hdc to the last to form a circle.
Round 2: Ch 3. In each stitch, do 2 dc joining the first st to the last st with a sl st.
Rounds 3 + 4: Ch 3. In each stitch, do 1 dc joining the first st to the last st with a sl st.
Round 5. Switch to the Natural Marl yarn I used or a yarn color of your choice. After joining the yarns, ch 3. Do 2 dc in the first stitch and then 1 dc in the next 3 stitches. Repeat the pattern joining the first st to the last st with a sl st.
Rounds 6 + 7. Ch 3. In each stitch, do 1 dc in each stitch joining the first st to the last st with a sl st.
Rounds 8 + 9. Ch 3. In the next 3 stitches do 1 dc then skip a stitch. Repeat the pattern joining the first st to the last st with a sl st.

Head Muzzle and Mouth:
Ch 9 in Bright Red. In the 7th st, do 1 hdc followed by a dc in the next 5 stitches and finally a hdc in the last stitch. Change yarns from Bright Red to Winter White. After joining the yarns, go around the red crocheted section with a SC in each stitch until you have outlined the whole mouth in Winter White. Ch 1 and repeat going around the mouth 2 1/2 more times stopping halfway through the third round.

Ears:
Using your Winter White yarn, ch 7. In the 5th st, do a hdc followed by a dc in the 4th st, a tc in the 3rd st, a dc in the 2nd st stitch and a hdc in the 1st st. It will have the appearance of a half circle.

Body:
Round 1: Using your Natural Marl yarn, Ch 4 connecting the first stitch to the last with a sl st to form a ring. Ch 2 and then 12 hdc in the center of the ring. Join the first hdc to the last to form a circle.
Round 2 +3: Ch 3. Do 2 dc in the first stitch followed by 1 dc in the next stitch repeating the pattern until you've reached the end of the round joining the first st to the last st with a sl st.
Rounds 4 + 5: Ch 3. In each stitch, do 1 dc joining the first st to the last st with a sl st.
Rounds 6. Ch 3. In the next 3 stitches do 1 dc then skip a stitch. Repeat the pattern joining the first st to the last st with a sl st.
Rounds 7. Ch 3. In each stitch, do 1 dc in each stitch joining the first st to the last st with a sl st.
Rounds 8 + 9. Ch 3. In the next 3 stitches do 1 dc then skip a stitch. Repeat the pattern joining the first st to the last st with a sl st.

Arms and Legs:
Round 1: Using your Winter White yarn, Ch 4 connecting the first stitch to the last with a sl st to form a ring. Ch 2 and then 10 hdc in the center of the ring. Join the first hdc to the last to form a circle.
Rounds 2 + 3: Ch 3. In each stitch do 1 dc joining the 1st st to the last st with a sl st.
Rounds 4 - 10: Changing the yarn to the Natural Marl, ch 3 and the repeat the same pattern in Rounds 2 + 3.

Tail:
Round 1: Using your Winter White yarn, Ch 4 connecting the first stitch to the last with a sl st to form a ring. Ch 2 and then 10 hdc in the center of the ring. Join the first hdc to the last to form a circle.
Rounds 2 - 4: Ch 3. In each stitch do 1 dc joining the 1st st to the last st with a sl st.
Rounds 5 - 12: Changing the yarn to the Natural Marl, ch 3 and the repeat the same pattern in Rounds 2 + 3.

Assembly:
Using the long tail of yarn from the knotted off last stitch, sew the openings of the arms, legs and tail closed. I did not stuff mine or put any weight in them. If you prefer with your monkey, do so before you sew it shut.
Next, stuff your head with Polyfil and then sew on your ears. Sew your muzzle on and leave an opening to stuff it. After it is stuffed, sew it closed.

Stuff your body next. I wanted to add a little bit of weight to my monkey so I used a new knee high filled with a mixture of steel shot and plastic pellets, tied it off, and placed it in my monkey's body instead of Polyfil .
Now, sew your head to your body and then sew on your arms, legs and tail. Your crocheted sock monkey is almost complete. It's now up to you to give him a personality by adding a some button eyes, a red pom pom to the top of his hat, little red bows around his arms and legs, and maybe a little jingle bell collar around his neck.

Please have fun making monkeys for your own personal enjoyment but respect my creativity and give me credit if you mention this pattern on your Blog or website. And if you do make a monkey for yourself or a gift, please send me a picture and I'll post it on my Blog giving you a link and a little write up describing your "creation!"

Please respect Lisa's TERMS OF USE:  My FREE tutorials, patterns, and how-to's are for personal use only and are not not intended for commercial use. They may not be copied, reprinted, emailed, or reproduced and distributed in any manner without my permission.

Lisa's Bio: Lisa is a professional teddy bear artist selling heirloom quality collectible bears to Adults and has been making bears professionally since November 1997. Her creations have been nominated for several Awards including the TITA, Teddy Bear Scene Reader's Choice Awards and the Ace Awards. They've also been included on a regular basis in many of the major doll and crafts magazines.

Copyright © 2007-2012 - All Rights Reserved - Lisa Bunting Thoms of Q.D. Patooties at http://qdpatooties.blogspot.com.

Please visit Lisa's Q.D. Patooties Spoonflower Fabric Shop and her Q.D. Patooties Etsy Shop.